
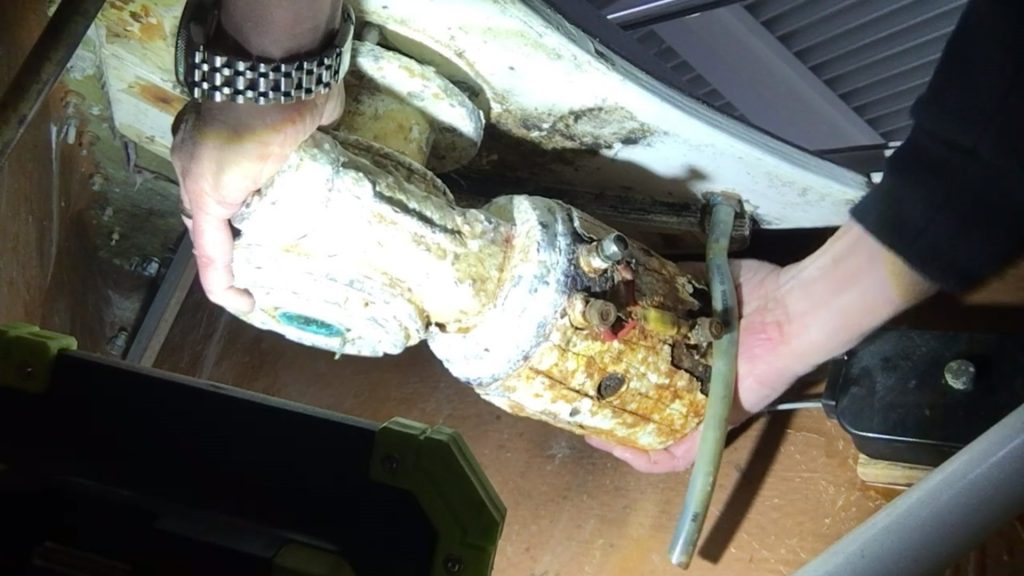
Our Lewmar Ocean windlass is over 30 years old and has always worked reliably. I must admit, however, that I have never paid much attention to the drive unit, which is located below deck and is difficult to access. Last winter I wanted to give the winch some maintenance, which according to the manual consists of lubricating the moving parts of the winch located on deck. On this occasion I took a closer look at the drive unit mounted in the anchor locker below deck. And yes, the sight was then but frightening, almost a fossil:
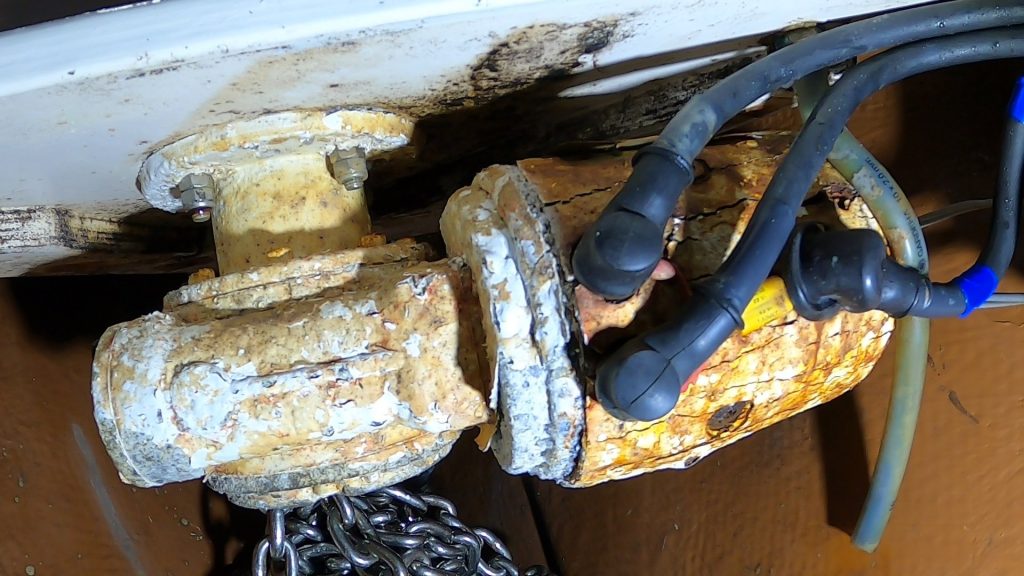
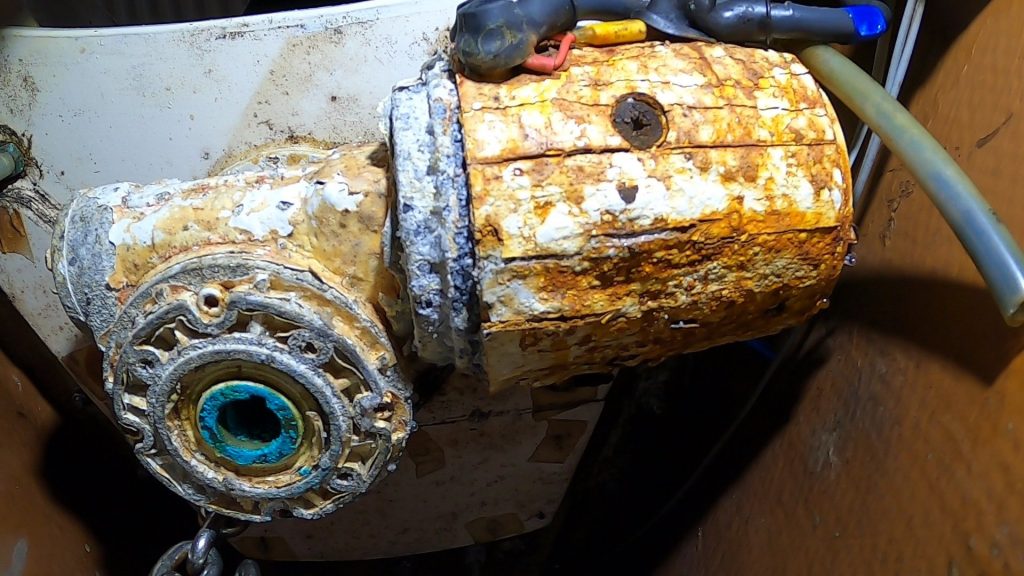
The housing of the gear unit is made of aluminum and covered with a thick powdery layer of corroded aluminum. The housing of the motor is made of steel and consists almost entirely of rust, which can be peeled off in thick layers – it borders on a miracle that the winch worked smoothly until the end.
Considering this condition, only 2 options remain: either replace the winch completely or at least replace the drive unit. For a complete replacement, however, there are some restrictions. The anchor locker is not very spacious and also on deck there is almost no room to position a differently designed winch..
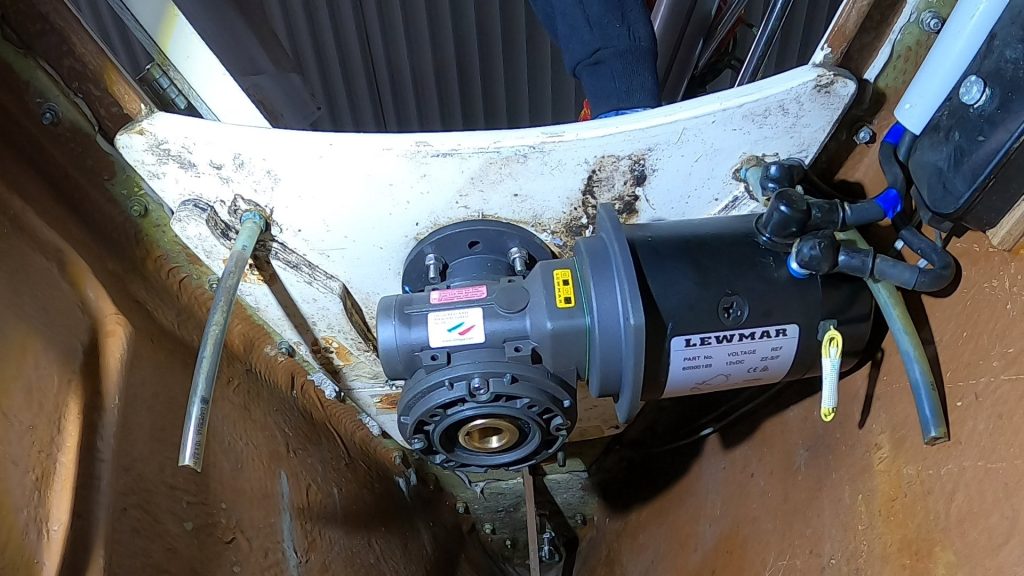
So I first contact Lewmar and try to find out whether the drive unit is still available as a spare part. My inquiry finally led me to Sailtec in Hamburg, which acts as Lewmar’s sales partner in Germany. In a friendly phone call, the exact type of winch is clarified and then it turns out that the drive unit of the successor model should also fit on my winch and can be ordered as a spare part. The part has almost the same dimensions and should thus also fit into the narrow anchor locker.
For me, this has the advantage that I don’t have to change anything in the electrical system and can continue to use the existing control panel. Only the electrical connections are – due to the relatively short cable lengths available – on the wrong side of the successor model. But this is not a problem, the company Sailtec can easily turn the engine 180 degrees and takes over this assembly service free of charge. This also preserves the warranty.
Then it’s time to get to work. Dismantling the old drive unit turns out to be more difficult than expected – as is always the case when doing work for the first time. The unit is attached to 4 M8 Niro bolts that go through the deck and are fixed at the top of the actual winch. Even unscrewing the double nuts proves tedious, because you can only get to the rear bolts with acrobatic contortions and no chance to see anything.

Unfortunately, the nuts sit so close to or behind the housing that you can’t get to them with either the socket or box wrench. After more than an hour of overhead fiddling with the open-end wrench, the nuts are off, but the unit still sits just as tightly on the bolts as before. No wonder, the Niro bolts are but by corrosion on the aluminum housing of the gearbox downright baked.
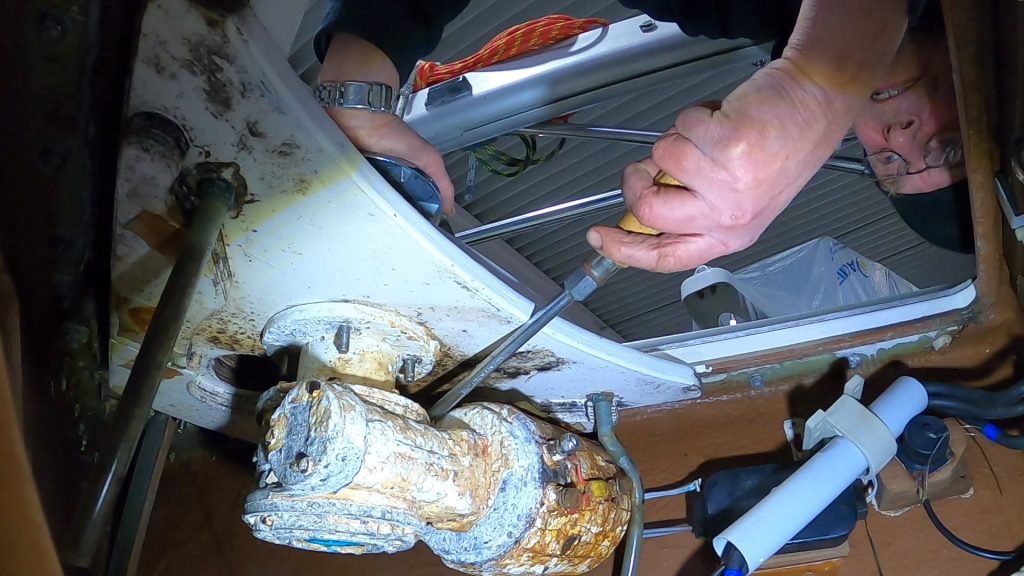
I awkwardly try to lever the drive unit down, but for lack of space and suitable starting points, nothing can be achieved, the unit does not move a millimeter. Finally, I position a lath on the end of the motor and tract it with a few measured hammer blows, which works.
Now unit can be moved back and forth a bit and after some jerking it suddenly slides down on the bolts and I can lift it out.
It’s a shame about the drive and gearbox, which still work smoothly, but both the aluminum and steel parts of the housing are in a completely rotten state: the only thing that can help here is a complete replacement.
Both the drive shaft for the winch and the bronze spring in the shaft for power transmission make a good impression, the winch seems to be fine so far. Only a little sluggish, so I take the opportunity to take it apart and make it smooth again.
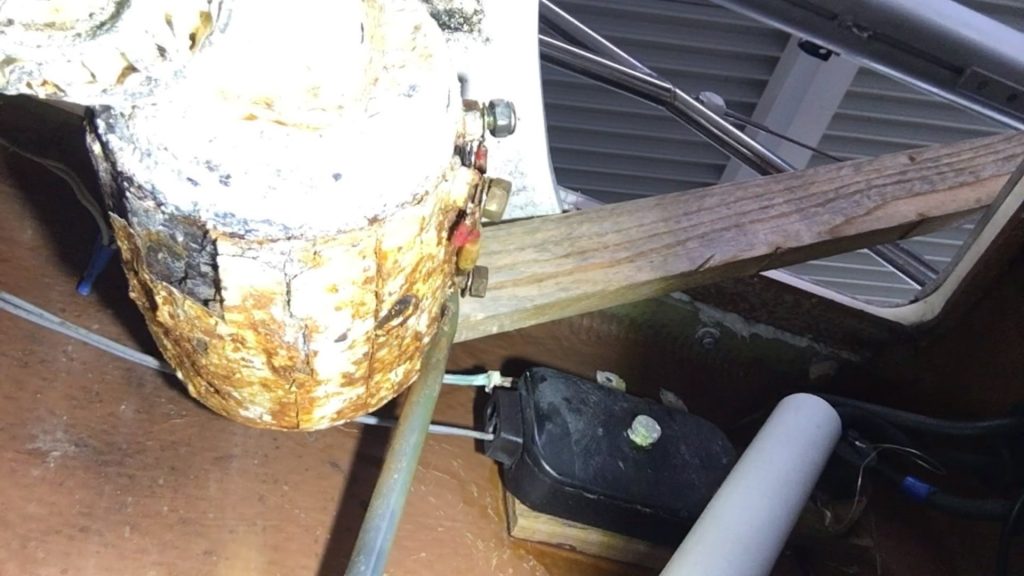
Mounting the new unit again proves to be more tedious than expected. The new engine is a few millimeters longer than the old one and butts up against the ship’s side just before the unit can be moved into the correct position for insertion onto the drive shaft and bolt.
In addition, the unit is quite heavy at certainly 12 kg, which makes freehand positioning difficult. Finally, I position the unit with wooden parts placed underneath and lift itself centimeter by centimeter into the right position.

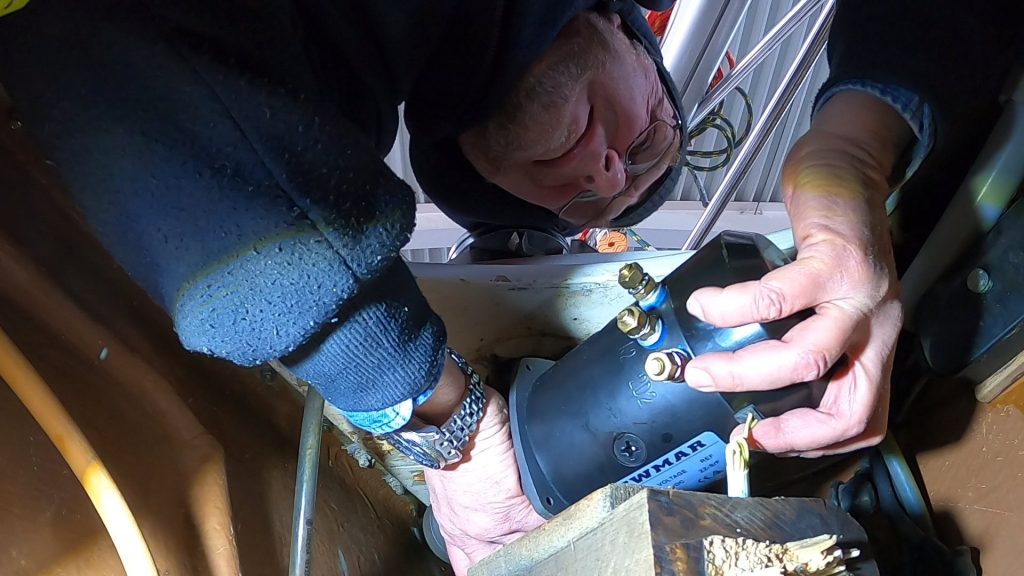
Great relief when finally all 4 bolts and the drive shaft engage and I only have to lever the unit upwards. The bolts I have lubricated in the upper area with TefGel to prevent so a corrosion-related “sticking”. Now tighten the nuts and you’re done.
I can continue to use the old cables incl. the shoes and the protective caps for connecting the electrics. The cable shoes are cleaned and screwed on, then pole grease on the connections and the protective caps over it. Test with connected control unit: perfect, everything runs again.