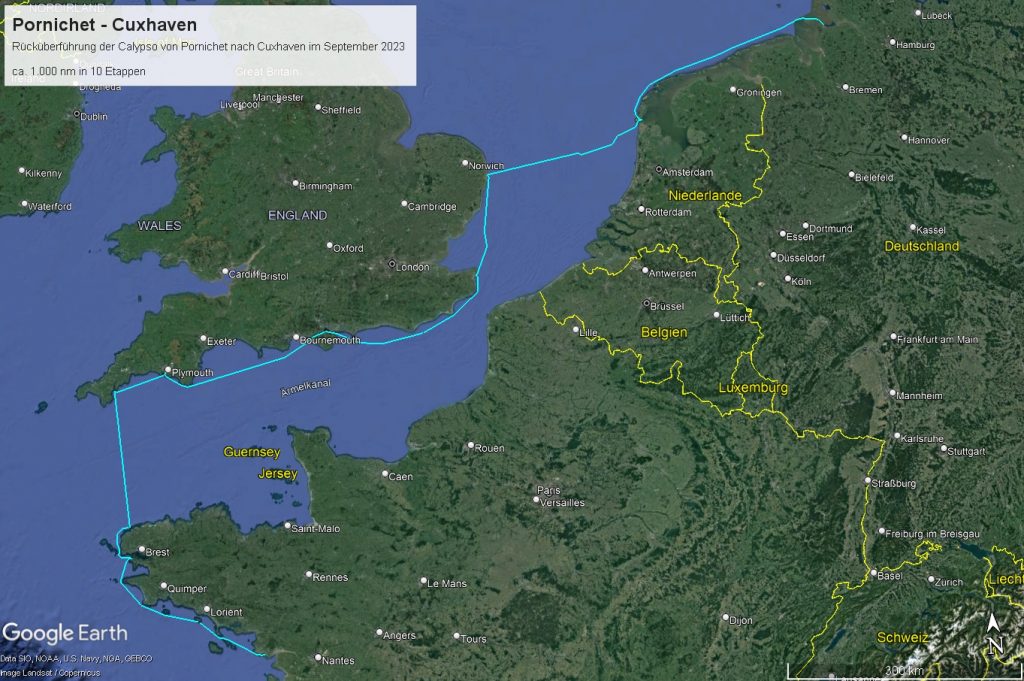
In early summer 2024, I was able to make a 4-week trip from the German Baltic Sea coast to southern Norway and back. Click here for the report.

In early summer 2024, I was able to make a 4-week trip from the German Baltic Sea coast to southern Norway and back. Click here for the report.
It was with a heavy heart that I made the decision back in the summer not to take the ship across the Bay of Biscay and on to Spain and Portugal to spend the winter there, but to bring it back to the Baltic Sea. It just turns out that for family reasons there are only a few weeks a year to be on the boat. Getting on a plane every time to sail in the most beautiful areas of Europe cannot compensate for the long weeks in which the ship is moored in expensive harbours and cannot be reached at all. It’s better to have the boat close by and maximise the time budget in summer to make the longest possible trips to beautiful and accessible areas. So the plan is to bring the boat back to the Baltic Sea from 8 September. I have to return home for a week on 28 September. Let’s see how far I can get by then. I have another week from 5 October to complete the transfer.
The plan was to sail the ship from the Baltic Sea to Galicia in the spring and then spend 5 – 6 weeks on holiday there the following summer and then continue to see.
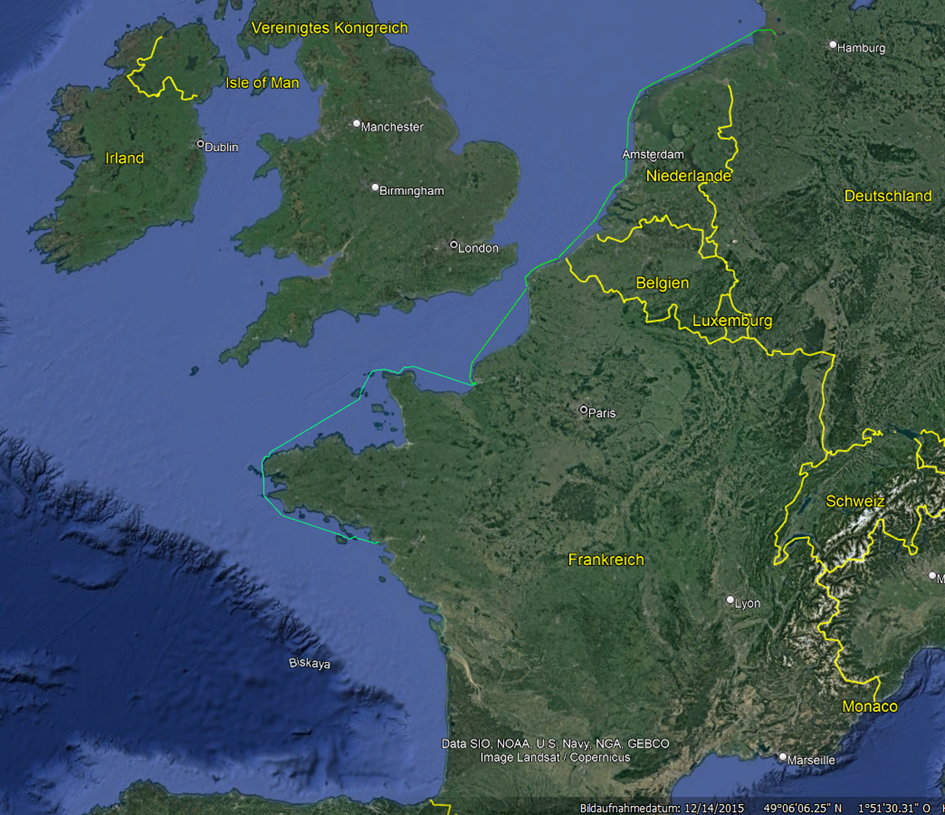
The idea was to start from the Baltic Sea at the end of March, first go to Cuxhaven and keep the start of the actual journey flexible in order to wait for a suitable weather window (stationary high over England or Scandinavia) and then go through to the destination in Galicia in one go if possible. The disadvantage of this flexible approach is, of course, that it is so easy to find no one who is willing and able to plan just as flexibly as a crew member. So it should mainly be a single-handed trip.
The available time budget for the trip from Cuxhaven was 2 weeks. To say it in advance: this and other resources were of course not enough to make it across the Bay of Biscay to Galicia. But in view of the beauty of what we experienced, that is not a pity. I see the experience as “taking the measure” in the best sense of the word. Find here my report:
As a die-hard Baltic sailor, you usually know the topic of sailing in tidal waters from the one or other driving licence exam, but the theory usually cannot convey a real feeling for the opportunities and risks and above all for the relevant aspects, at least not to me.
What do you have to pay attention to when planning a route, where do you get the relevant information quickly and reliably and how do you take it into account appropriately: on the one hand already in the long-term planning, but on the other hand also in the short-term detailed routing on the water.

Raz de Sein seen from Pointe de Raz
Find here a report about the concrete planning of an exciting section on my cruise from Cuxhaven to Brittany.
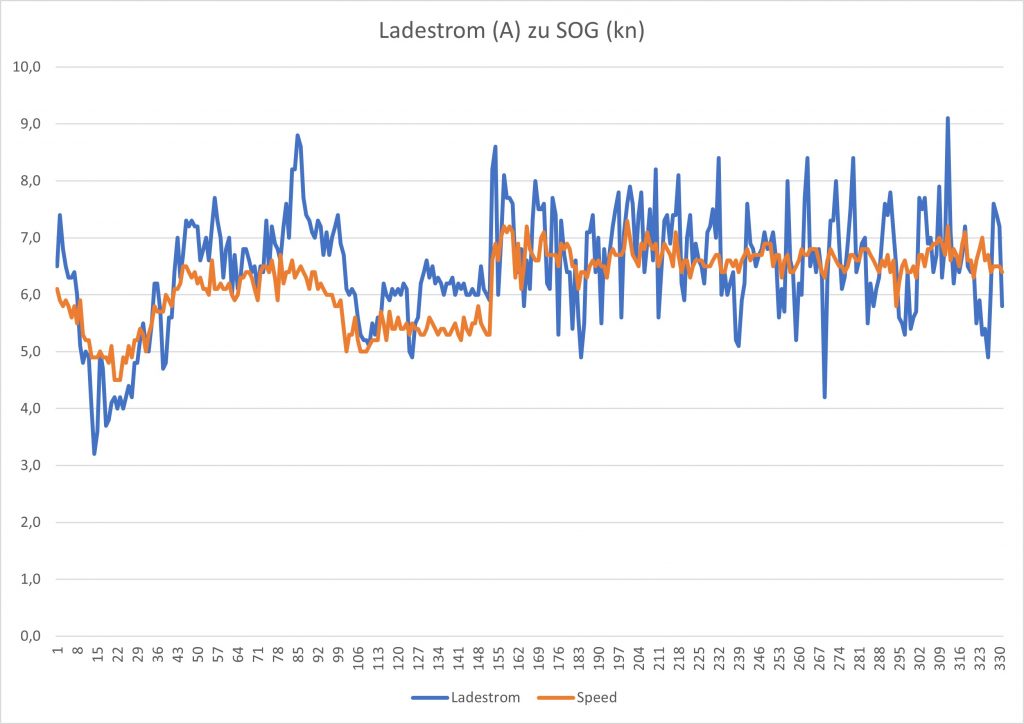
When sailing – especially on longer non-stop trips – I don’t want to have to worry about the state of charge of the batteries. I just want to use all the consumers as required. And with the navigation computer, radar, outside screen in the cockpit, autopilot, etc., that can add up to quite a lot. How does a hydrogenerator work in this respect? Read here about my experiences last summer.
For the Volvo Penta Saildrive (S 120), the prescribed maintenance cycle for changing the diaphragm is 7 years. In regard to the diaphragm, which is made of more than 5 mm thick special rubber and should not be exposed to any significant mechanical or chemical stress under normal circumstances, this is quite a sporty rhythm..
I have owned my boat for over 10 years without ever having replaced the diaphragm and assume that the previous owner never did either in the years before. As far as can be seen from the engine room, the old diaphragm was in excellent condition, only in the front hard-to-reach area under the engine was a yellowish coating visible, which I can not assess or explain.
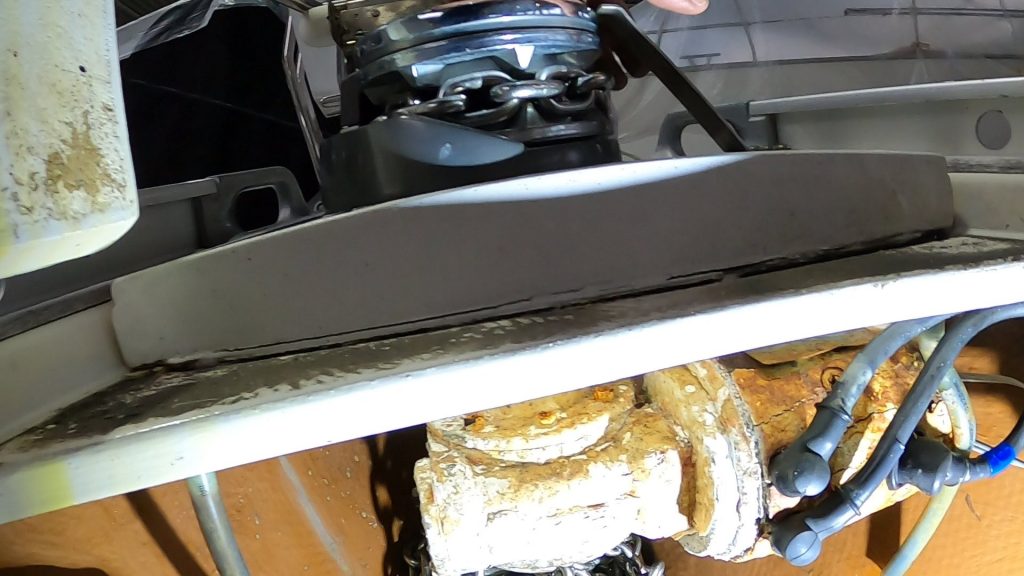
If it were only a matter of the diaphragm, I would take my chances and continue to drive with the old diaphragm until there are serious signs of wear or leaks. Then there would still be enough time to react. If it wasn’t for the seacock for the cooling water supply at the saildrive. It is extremely sluggish and can hardly be operated properly. The plastic washer originally intended for the closing is no longer usable at all, because it has a much too small lever. The plastic square for the lock, on which the disc once sat, can still somehow be gripped and operated with aids, but it is not safe to handle and it is only a matter of time before the square will be round. An unfortunately well-known and safety-relevant problem.
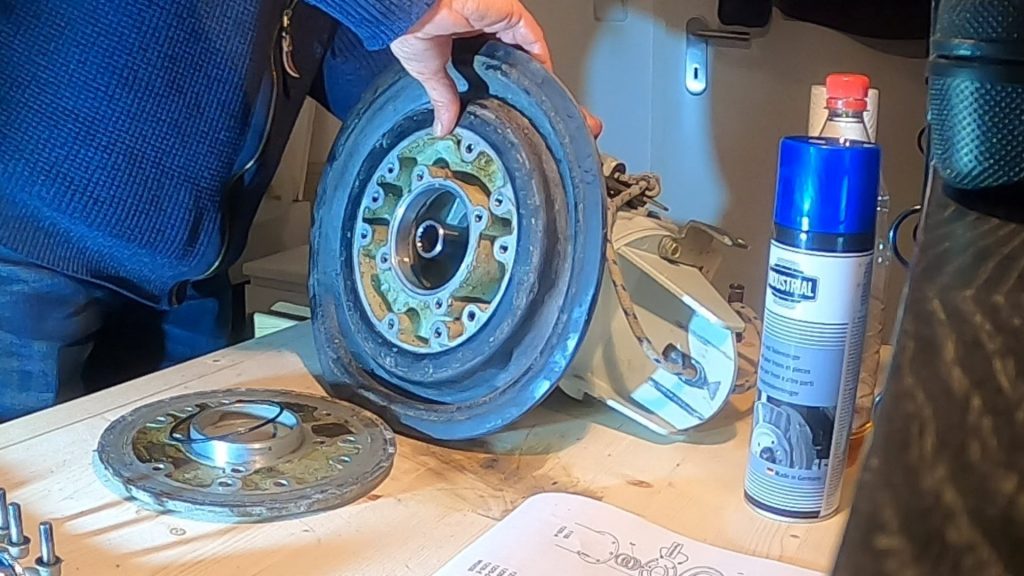
Since the seacock can not be managed without the removal of the Saildrive, I decide to make nails with heads and replace the diaphragm and valve on this occasion. The exchange is a complex and also somewhat more demanding work, which can quickly cost up to 2,000 €, if a commercial service provider takes over. For this reason, I consider doing it myself and look on the Internet, what I can find so DIY instructions and experience reports.
By far the most detailed and instructive report I could find is from Chris, who runs the vlog “Sailing Britaly”. He describes the individual steps and also the unexpected challenges so detailed and clear that even I as a layman get the courage to try it on my own. I can only recommend to anyone who wants to do this work themselves to take a close look at Chris’ report: you can’t show it any smarter than this.
Find here how I did it:
Experience report or watch the Video
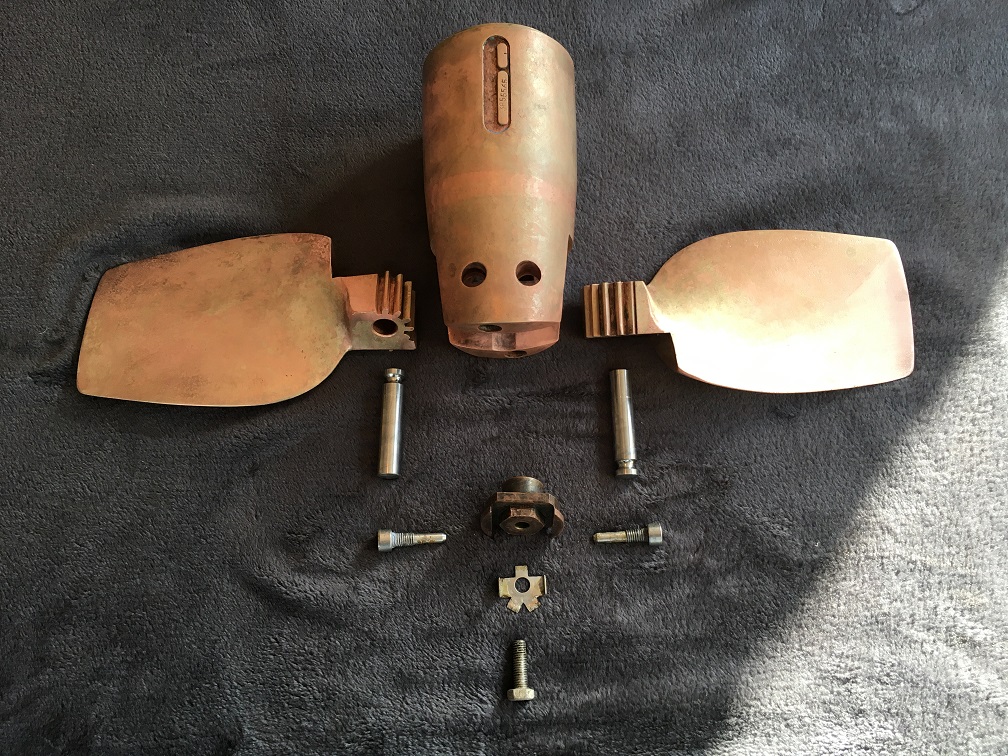
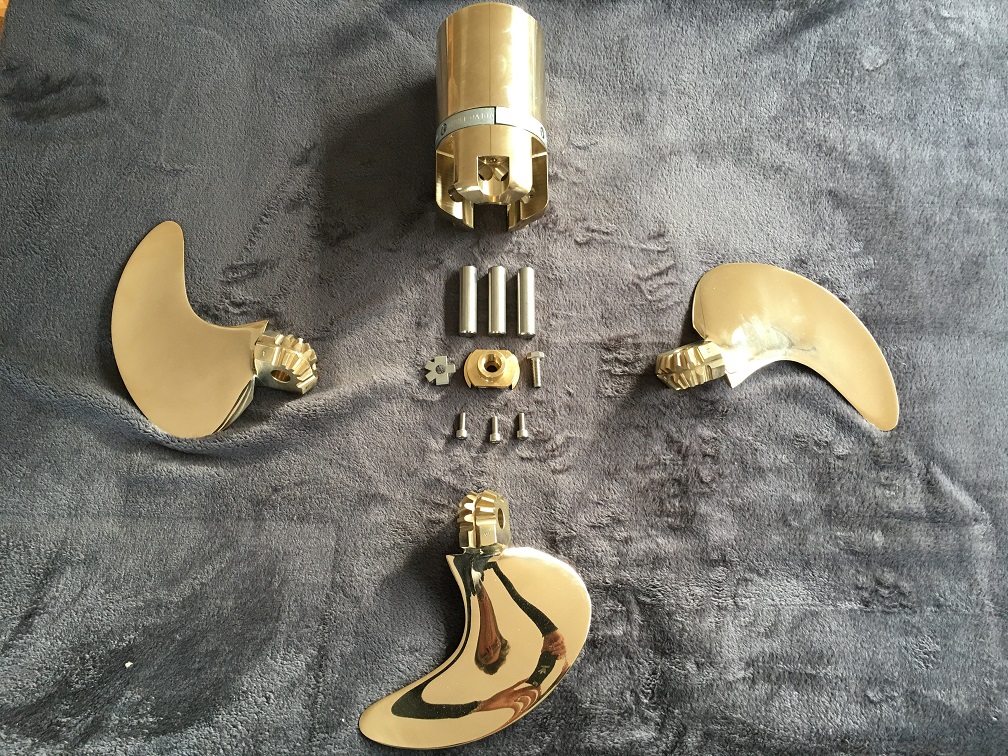
For 10 years now we have been sailing with a 2 blade folding propeller on the Saildrive and a Volvo Penta 2003 with 28 hp and every now and then I have wished for more power on the propeller in certain situations. Find here a report about the change from a 2 blade to a 3 blade Saildrive folding propeller.
Please find here a field report on Internet on board (near shore) based on WiFi and mobile radio.